Well, this might be boring, boring, boring or interesting. Its really just what it is, boat issues. So:
OK, here's an update on the fuel tank repairs on Broulee as covered in the blog of January 1. We left you there with the completion of the leaky port tank repair and 3 new inspection ports installed. The next step for the port side was refinishing of the wall between the tank and engine room. Here it is:
OK, here's an update on the fuel tank repairs on Broulee as covered in the blog of January 1. We left you there with the completion of the leaky port tank repair and 3 new inspection ports installed. The next step for the port side was refinishing of the wall between the tank and engine room. Here it is:

Series 5052 aluminum sheet was applied to the wall for the fixed sections and King Starboard was used for the removable portions. Those would be 3 inspection port coverings and 2 access covers/doors for the above tank area inspection as well as any future needs, i.e. wiring, cable runs. Area still needs some additional work to include securing wiring at ceiling area and re-installing the fuel polishing system.
At this point all of the fuel has been moved from the starboard tank into the now fully repaired port tank, which should be good for another "life time". Now for the starboard tank! No leaking there. At least not yet. But after seeing the pile of "stuff" and corrosion in the port tank there was no way to ignore the starboard tank. So;

Here's the original inspection port, 9 inches. Good enough to look in and get a look at what's there. So, here's a peek into the tank.

And this is what was there, a bit of diesel and the ubiquitous "tar" on the bottom and partly on the walls.
Mopping up the diesel and a bit of the tar and the "asphalt" is visible in the corner. But not as much crust as was found in the port tank. But plenty of soft crud.

Results of the mopping up. And it is stinky!
Petroleums and dead organics, ugh. And I could see some amount of pitting, so:

Time to cut the hole. Needed a "protractor", so made a jig with 6 inches on one end and 7 inches on the other to mark the hole to be cut out (12 inches) and the outside of the cover plate (14 inches). Marking the outside extent of the cover plate made it easier to mark and drill the plate bolt holes.

And the "fun!" of cutting. Jig saw does not fit without more wall removal, so, as before, sawsall.
 New forward access hole cut so now to the cleaning and further inspection.

And after new hole cut and hard stuff removed the extent of the pitting was visible. Mostly within the area marked above with minor erosion in other areas and the light surface rust on the "ceiling". Probably some years before a hole would have developed, but only a matter of time.
 Close up of the pitting in same area as previous photo.
 Surface rust on "ceiling" and walls. Baffle in picture is between forward section and middle section of tank.
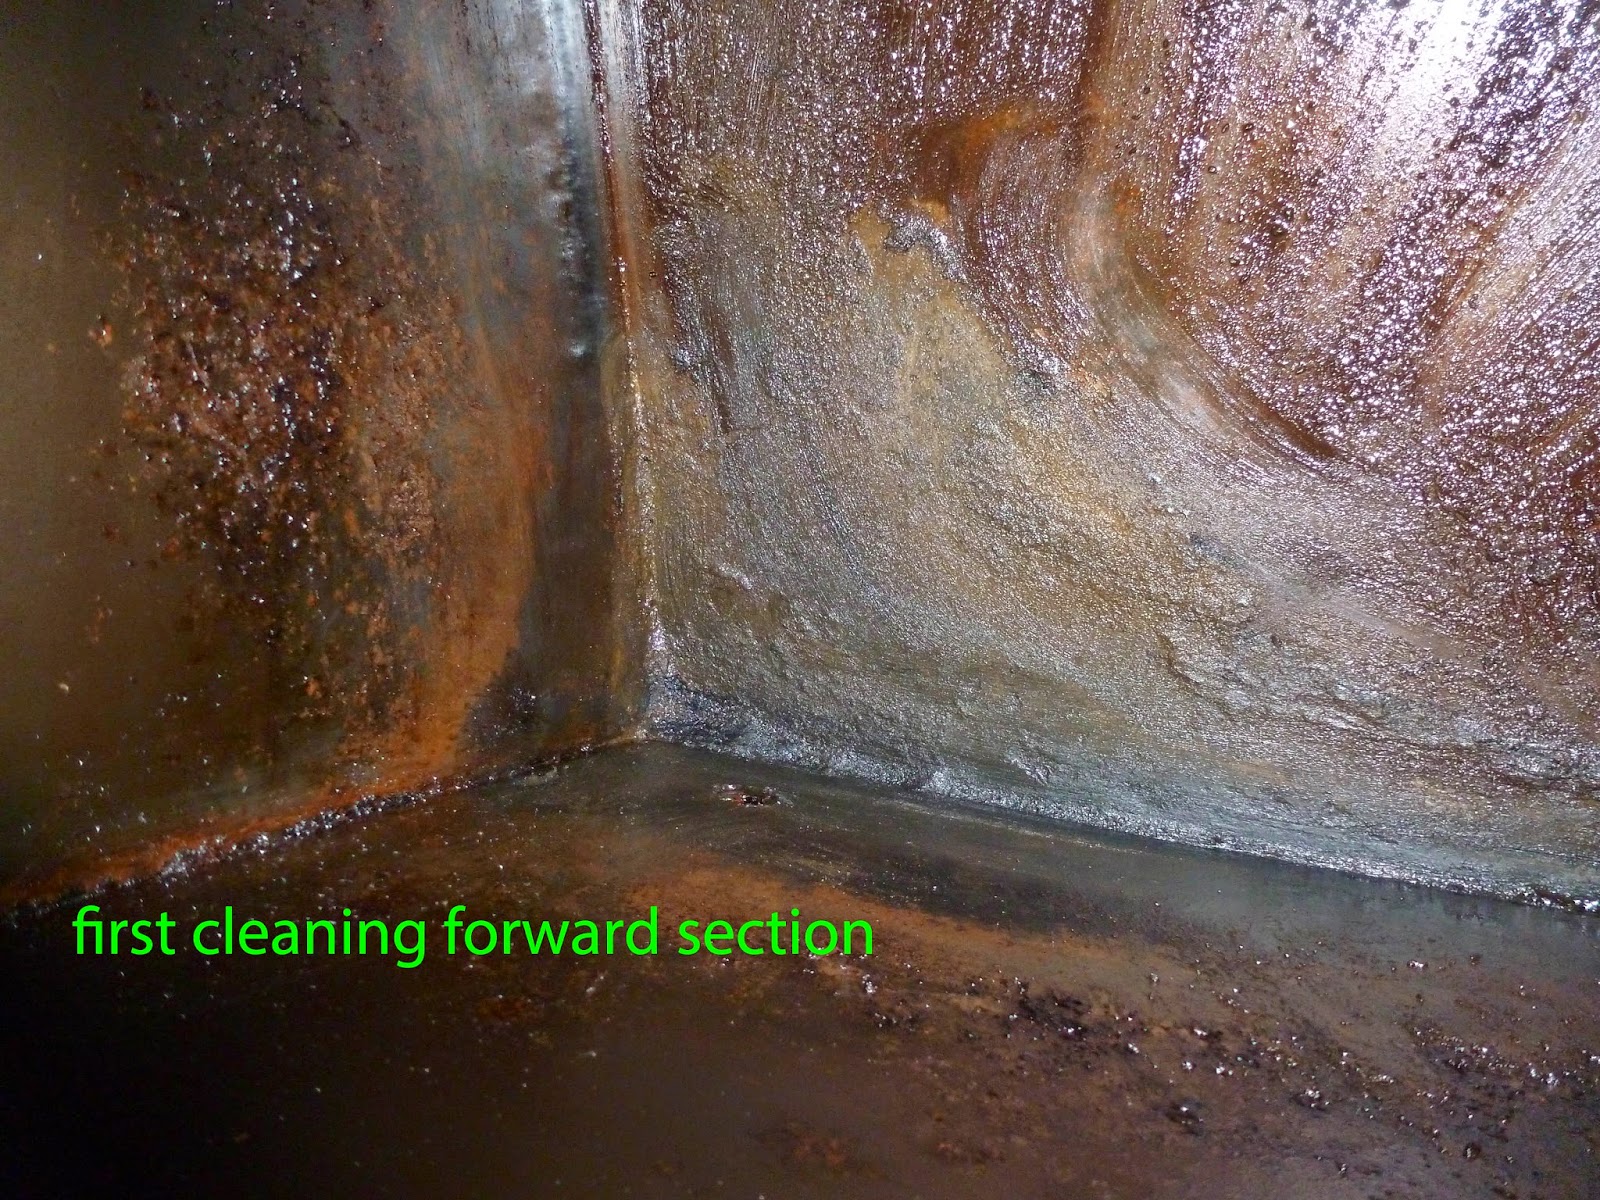
 Forward section prior to cleaning.
 Another picture of the tar coating much of the bottom. Its likely dead organisms left over after those "wonderful" diesel additives to kill them. Guess it killed them, but even with the fuel polisher this stuff is there.
 Forward section after
washing and scrubbing with water and dishwasher detergent. Wire brushing, sanding and acetone will smooth out the finish while providing some "tooth" for the epoxy, where applied, and the polysulfide.
The aft section inspection/access hole was cut and the holes drilled for the plate bolts. The middle section was in good condition with the exception of a small area next to the baffle between it and the forward section, so did not install an access hole in that section. Cleaning for that section could be completed from the forward and aft sections.
After the water cleaning of the entire tank, the seams and areas to be worked were flushed and wiped down with acetone to remove any oils, diesel or tar residue. Time to seal the seams, so:
This time I tried West System Six10 thickened epoxy available in a caulk gun tube which mixes as it is dispensed. Previously I had mixed laminating epoxy, thickened with a high density filler and spread with a tongue depressor. Much faster applying with the caulk gun.
Also note the pitting just below the words "West System". This was at the top edge of the "stuff" on the bottom. This entire area was then treated as the port tank, layering epoxy and fiberglass cloth to seal and add strength in the pitted area. (Pictures of that work in this tank"disappeared"?.)
After the epoxy work and the area further cleaned with MEK it was ready for the polysulfide, Flamemaster CS 3204 B4 and B2 (B4 gives 4 hour work time, B2 gives 2 hours) supplied by SealPak, Inc.
( www.sealpackcoinc.com )

 Ready to go to "work"! That stuff gets everywhere. Best to cover up cause its hard to remove later.
By the way, when the tank goo, acetone or MEK and this stuff are brought out, the Admiral and Crew (Izzy) are "out of here", time for walking or shopping or anything away from the stink!! Good to know someones smart around here.
Also note the pitting just below the words "West System". This was at the top edge of the "stuff" on the bottom. This entire area was then treated as the port tank, layering epoxy and fiberglass cloth to seal and add strength in the pitted area. (Pictures of that work in this tank"disappeared"?.)
After the epoxy work and the area further cleaned with MEK it was ready for the polysulfide, Flamemaster CS 3204 B4 and B2 (B4 gives 4 hour work time, B2 gives 2 hours) supplied by SealPak, Inc.
( www.sealpackcoinc.com )
The polysulfide fully mixed and ready for application. After using B2 formulation in the port tank and finding 2 hours was not enough time to work, B4 was used for the first application to allow more work time in the heavily worn areas. A second application was done using the B2.
By the way, when the tank goo, acetone or MEK and this stuff are brought out, the Admiral and Crew (Izzy) are "out of here", time for walking or shopping or anything away from the stink!! Good to know someones smart around here.


As in the port tank, I have opted to only apply the polysulfide to the pitted/corrosion areas and where I could thoroughly clean.
Sealing completed so time to close up the ports;

Seabuilt ( www.seabuilt.com) supplier of access plates) says the bolts are sealed with a proprietary thread seal, but my approach was I had the polysulfide available so why not further seal the bolts. (Belts and suspenders?)

The forward section plates installed. (Note the intake engine room fan above plates. It's a Lil' Champ 737cfm 12 vdc fan from Delta T Systems; but that's another story.)


Now to pressure test this tank and then install the starboard wall coverings, complete some wiring relocation, re-install the fuel polisher (do those things really work?) and get back to the "normal" boat to-do list. Oh, and, you better believe, put 'inspect/clean fuel tanks' on that periodic maintenance list!
--------------------
Previous post note:
On The January 1 post we showed 'Izzy checking out the funny looking ducks...'.
Well a follower/friend advised they are Moscoy ducks. Native from Mexico, Central and South America, these most likely were the domesticated variety. Maybe you already knew that.
No comments:
Post a Comment